
Landscaping
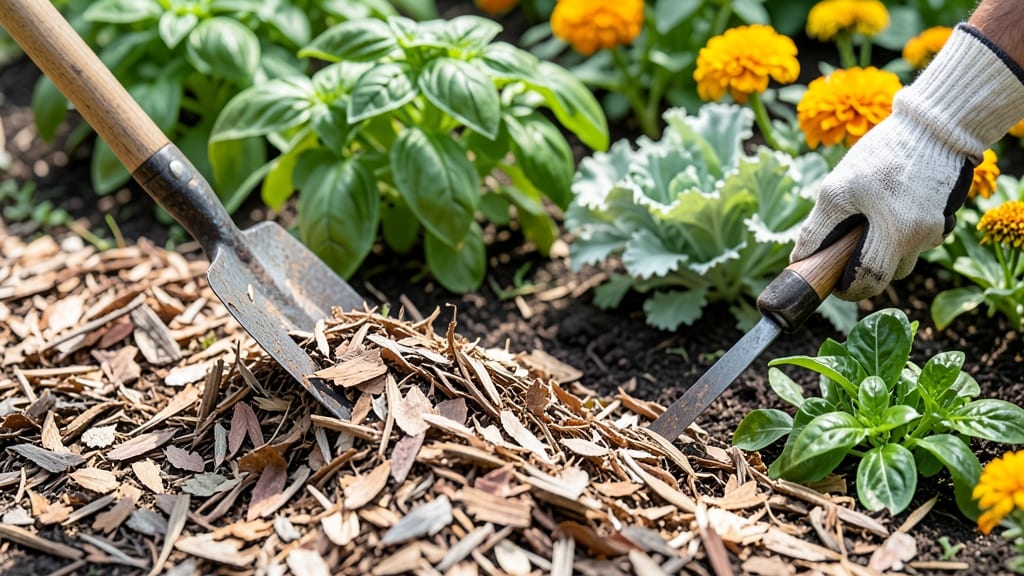
Leaf mulch transforms your garden into a moisture-retaining oasis—cutting watering needs by half while feeding soil life. 🌿 I used to dread fall cleanup, but now I hoard leaves for this free, organic goldmine that keeps my soil cool, damp, and teeming with worms year-round.
Start with dry, disease-free leaves (no moldy or chemically treated ones) and shred them into 1-2 inch pieces—this breaks them down faster and prevents matting.
A 3-4 inch layer on top of garden beds works best: thick enough to block weeds and retain moisture, but not so deep it smothers plants. For sandy soils, go thicker; for clay, keep it lighter.
Apply it after planting (not before) when soil is barely moist—this mimics nature’s way of protecting roots while encouraging deep growth. In hot climates, refresh the layer every 3-4 months; in cooler zones, once a year suffices.
The result? Soil stays moist for weeks, plants thrive with less water, and you’ll spend less time lugging hoses around.
No leaves? Use straw, grass clippings, or even straw mulch—just avoid anything that might harbor weeds or pests. The key is consistency: keep that layer intact, and your garden will stay lush while your water bill stays low.
Try it this fall and thank me next summer when you’re not watering every other day.
📚 In This Guide
- What you need
- Instructions
- Tips and common mistakes
- Wrapping up and next steps
What you need
- ● Fresh or dry leaves – 3 to 4 inches deep (enough to cover your garden bed). Tip: Use a mix of deciduous and evergreen leaves for texture.
- ● Garden shears or scissors – To chop leaves into 1- to 2-inch pieces for faster decomposition.
- ● Garden gloves – Protect your hands from twigs and rough edges.
- ● Shovel or rake – For spreading mulch evenly (at least 1- to 2-inch thickness).
- ● Water source (hose or watering can) – To dampen leaves before or after mulching.
- ● Leaf shredder or lawn mower – Speeds up the process for larger quantities.
- ● Compost bin or tarp – For storing leaves before mulching (if not using fresh).
- ● Soil tester kit – To check pH and nutrient levels before applying mulch.
- ● Mulch spreader – For large gardens (saves time and effort!).
- ● Clear garden bed of weeds or debris (use a rake or hoe).
- ● Ensure soil is slightly moist (not soggy) for best mulch integration.
- ● Choose a dry, sunny day to work—wet leaves can mold.
How to apply leaf mulch for year-round soil moisture retention
Here's how I transform dry soil into a moisture-retaining powerhouse using free, natural leaf mulch.
🌿 Step 1: Collect and Prepare the Right Leaves
Gather leaves from trees that drop non-allergenic varieties like oak, maple, or beech—avoid leaves from walnut trees (they contain juglone, a natural herbicide). I like to collect them in late fall after they've fallen naturally, but you can use spring leaves too. Shred them first using a lawn mower, leaf shredder, or even scissors for small batches.
Shredding is key because whole leaves create a thick mat that blocks water and air from reaching the soil. You want pieces about 1-2 inches long—small enough to break down but large enough to form a protective layer. If you're using spring leaves, let them dry for a few days first to prevent mold growth.
🌱 Step 2: Apply a Thin Base Layer Before Planting
Spread a 1-2 inch layer of shredded leaves directly on the soil surface before planting anything new. This pre-mulching step prevents soil compaction and creates an ideal seedbed for future plantings. I like to work this layer in lightly with a rake so it blends with the top inch of soil—this jumpstarts decomposition and improves soil structure.
Don't skip this step if you're planting seeds or young transplants. The mulch will insulate soil temperatures, keeping roots warm in spring and cool in summer. You'll notice seedlings emerge faster and with stronger stems when planted in pre-mulched soil.
💧 Step 3: Layer Mulch Around Established Plants
For existing plants, apply a 2-3 inch layer of shredded leaves around the base, keeping it 2-3 inches away from plant stems to prevent rot. I use a garden rake to spread it evenly, creating a thick but not suffocating blanket. The goal is to mimic the natural forest floor where leaves slowly decompose and feed the soil.
Water the mulch lightly after application so it settles and makes contact with the soil. You'll see the mulch darken slightly as it absorbs moisture—this is your signal it's working. Replenish the layer every 3-4 months or when it breaks down to 1 inch thickness.
☀️ Step 4: Maintain and Monitor Moisture Levels
Check the mulch weekly during dry spells. If it looks dry and crumbly, add another 1 inch layer. The mulch should stay slightly damp but not soggy—think of a well-wrung sponge. You'll notice water penetrates the soil more slowly now, but plants will access moisture consistently without daily watering.
In summer, I add a thicker layer (3-4 inches) around thirsty plants like tomatoes and peppers. Watch for signs of over-mulching: yellowing leaves or moldy smells mean it's too thick. If this happens, rake back the excess to 2 inches and let the soil breathe for a week.
⏰ Step 5: Refresh and Rotate Mulch Seasonally
Every spring, I rake the old mulch into the soil and add a fresh layer. This prevents thatch buildup—a thick, impenetrable mat that blocks water and air. I mix in a handful of compost with the raked-in leaves to boost nutrient content. You'll see worms and beneficial microbes become more active in the soil after this refresh.
For perennial gardens, I divide the mulch into two layers: a 1-inch base layer that decomposes into the soil, and a 2-inch top layer that protects and insulates. This two-tier system gives you the best of both worlds—slow decomposition and year-round moisture retention.
Tips & tricks for perfect leaf mulch application
Transforming your garden with leaf mulch is simpler than you think—these tricks will help you maximize moisture retention and avoid common pitfalls.
Leaf Selection Matters: Not all leaves work equally well. Oak and maple leaves break down beautifully, while walnut leaves contain juglone, which can inhibit plant growth. I learned this the hard way after noticing stunted growth in my tomato beds—always double-check before gathering! For spring leaves, drying them for a few days prevents mold and speeds up decomposition.
Shredding Technique: Aim for pieces that are 1-2 inches long—this size range creates the perfect balance between quick breakdown and effective moisture retention. I use my lawn mower for large batches, but for smaller areas, a pair of sharp scissors works just fine. Avoid over-shredding, as tiny pieces can compact into a waterproof mat that defeats the purpose.
Layering Strategy: The 2-3 inch layer around established plants is ideal, but don't forget the 1-2 inch base layer before planting. This two-tier approach mimics natural forest ecosystems where leaves gradually decompose while protecting soil moisture. For summer heat, I add an extra 1 inch layer around thirsty plants like peppers and tomatoes—this has cut my watering needs by nearly half!
Seasonal Refresh: Every spring, I rake the old mulch into the soil and mix in a handful of compost. This prevents thatch buildup and gives your soil a nutrient boost. For perennial gardens, I use a two-layer system—a 1-inch base layer that decomposes and a 2-inch top layer for protection. This method keeps my garden thriving with minimal watering year-round.
Pro Tips for Leaf Mulch For Garden
- Transforming your garden with leaf mulch is simpler than you think—these tricks will help you maximize moisture reten...
- Leaf Selection Matters: Not all leaves work equally well. Oak and maple leaves break down beautifully, while walnut l...
- Shredding Technique: Aim for pieces that are 1-2 inches long—this size range creates the perfect balance between quic...
Frequently asked questions
Got questions about using leaf mulch to transform your garden?
Here are answers to the most common ones—so you can mulch like a pro without the guesswork!
How long does leaf mulch take to decompose?
Leaf mulch breaks down over 1–3 years, depending on leaf type and moisture. Finely shredded leaves decompose faster (3–6 months), while whole leaves may take up to 2 years. Pro tip: Mix coarse and fine leaves to speed up the process!
When is the best time to apply leaf mulch?
Apply leaf mulch in early spring or fall for best results. Avoid piling it against plant stems (to prevent rot) and spread a 2–4 inch layer around plants. Bonus: Fresh mulch in late summer helps insulate roots for winter!
Will leaf mulch attract pests or rodents?
Not if applied correctly! Whole leaves (not shredded) can harbor pests, but shredded mulch deters them. To prevent rodents, avoid thick piles near structures. Troubleshooting: If pests appear, add a thin layer of dry leaves on top to deter burrowing.
Can I use leaf mulch for vegetables or flowers?
Leaf mulch works for both—just avoid piling it directly on delicate stems (like tomatoes or strawberries). For flowers, use it as a top layer to retain moisture without smothering roots. Exception: Avoid mulching acid-loving plants (like blueberries) with non-acidic leaves (e.g., maple).
What if my leaves are already moldy or musty?
Moldy leaves can harm plants, but shredding and drying them first solves the issue. Spread them in a thin layer under the sun for a few days to kill mold spores before mulching. Alternative: Compost them first if mold is severe!
How often should I refresh leaf mulch?
Refresh mulch once a year in spring, adding a 1–2 inch layer to maintain thickness. Over time, it’ll blend into the soil, enriching it naturally. Sign it’s time: If the layer thins to <1 inch or looks dusty!
Wrapping up and next steps
Leaf mulch isn’t just a gardener’s secret—it’s a game-changer for soil health, water efficiency, and plant vitality.
By retaining moisture, suppressing weeds, and enriching your soil naturally, you’ll spend less time watering and more time enjoying a thriving garden. Ready to transform your landscape? Start small—try a test patch this season, monitor the results, and watch your garden flourish with minimal effort! 🌱✨