
Pests and Diseases
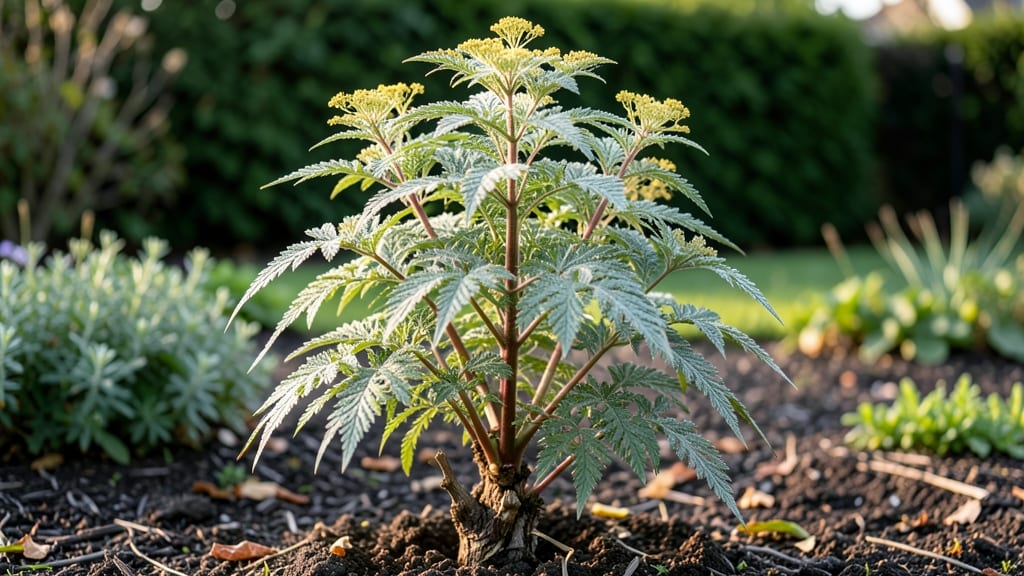
Artemisia vulgaris leaf—nature’s built-in pest repellent—can transform your garden from a bug buffet into a fortress. 🌿 I’ve grown mugwort for years, and its silvery foliage isn’t just pretty; it keeps aphids, cabbage worms, and even deer at bay with its strong scent.
The secret lies in its hardiness and versatility, whether you plant it as a border, companion, or standalone pest deterrent.
This tough perennial thrives in poor, well-drained soil and full sun, making it perfect for rocky spots or neglected corners where other plants struggle. Water it sparingly—overwatering turns its silvery leaves yellow—and watch it spread effortlessly.
Propagation is a breeze: just divide clumps in spring or scatter seeds in fall. By summer, you’ll have a lush, fragrant hedge that doubles as a natural insecticide.
Harvest leaves anytime for pest control, but late summer gives you the strongest aroma. Crush a few and place them near vulnerable plants, or dry them for winter use. The leaves also make a tea for digestion or a culinary seasoning (though use sparingly—it’s potent!).
Just be warned: mugwort can spread aggressively, so contain it with roots barriers if needed.
For best results, prune back in early spring to encourage bushier growth, and avoid planting near pathways where it might take over. With minimal care, this low-maintenance powerhouse will reward you with a garden that’s both beautiful and bug-free. Ready to give it a try?
📚 In This Guide
- What you need
- Instructions
- Tips and common mistakes
- Wrapping up and next steps
What you need
- ● Artemisia vulgaris leaves: 1–2 cups (fresh) or ½ cup (dried). Harvest from organic sources or grow your own for maximum potency.
- ● Water: 4 cups (for sprays) or as needed (for infusions). Use filtered or rainwater for best results.
- ● Container: A 1-gallon spray bottle (glass or food-grade plastic) or a large pot for boiling.
- ● Cheesecloth or fine mesh strainer: For straining leaf infusions.
- ○ Optional companion plants: If planting near veggies, include basil, marigolds, or garlic for extra pest deterrence.
- ● Pruning shears or scissors: For harvesting leaves cleanly.
- ○ Glove (optional): Some folks are sensitive to mugwort’s oils—wear gloves if needed!
- ● Labeling tags: To mark your homemade sprays and sachets.
- ● Drying rack or paper towels: For air-drying leaves if making long-term sachets.
- ○ Essential oil diffuser (optional): For repelling pests indoors with mugwort’s aroma.
Step-by-Step guide to cultivating Artemisia vulgaris for natural pest control
This hardy perennial thrives with minimal fuss and delivers year-round pest protection once established.
🌱 Step 1: Select and Prepare Planting Sites
Artemisia vulgaris tolerates a wide range of conditions but performs best in full sun with 6+ hours of direct light daily. Choose locations where pests are most problematic—near vegetable beds, along walkways, or near entry points where insects congregate. The plant's strong scent deters pests without harming beneficial insects like bees.
Amend the soil with compost or aged manure to improve drainage, as Artemisia hates soggy roots. Work the amendment into the top 6 inches of soil and rake smooth. The plant's deep taproot means you won't need to disturb it often after planting. Here's the thing—if your soil is heavy clay, mound the amended soil into a 12-inch-high ridge to prevent waterlogging.
🌿 Step 2: Plant Artemisia with Proper Spacing
For optimal pest-repellent coverage, plant Artemisia 18-24 inches apart in rows spaced 3 feet apart. This spacing allows the plants to establish without competing for resources while still creating a dense, aromatic barrier. Dig holes just deep enough to accommodate the root ball without burying the crown—Artemisia's woody base should sit slightly above soil level.
Water deeply after planting to settle the soil and encourage root contact. You'll see new growth within 2-3 weeks if conditions are right. Real talk: Artemisia's first year focuses on root development, so resist the urge to harvest leaves until the plant has established a strong base. The stronger the roots, the more vigorous the pest-repellent properties.
☀️ Step 3: Maintain Through the Growing Season
Once established, Artemisia requires minimal care but thrives with weekly watering during dry spells—watch for wilting leaves as your signal to water. The plant's silvery foliage reflects sunlight naturally, reducing water loss, but prolonged drought will cause leaves to yellow. Mulch with 2-3 inches of straw or wood chips to retain moisture and suppress weeds that compete with Artemisia's shallow roots.
Prune back leggy growth in early spring to encourage bushier, denser foliage. Cut stems back by one-third just as new shoots begin to emerge. This prevents the plant from becoming too woody and maintains its pest-repellent effectiveness. You'll notice the scent intensifies after pruning—that's when Artemisia's natural compounds peak.
✂️ Step 4: Harvest and Use Leaves Strategically
Harvest leaves anytime during the growing season by snipping stems just above a leaf node. The plant's pest-repellent oils are most concentrated in the foliage, so avoid harvesting woody stems. Bundle stems and hang them upside down in a dry, shaded area to preserve their aromatic properties. Dried Artemisia retains its scent for months and can be used in sachets, potpourri, or as a natural mulch around vulnerable plants.
For immediate pest control, crush fresh leaves and scatter them around problem areas. The released oils deter ants, aphids, and even mosquitoes. I know it seems counterintuitive, but don't remove all the leaves—leaving some foliage ensures continuous pest suppression. The plant's natural regrowth keeps the scent active throughout the season.
⏰ Step 5: Overwinter for Year-Round Protection
Artemisia vulgaris is hardy in USDA zones 3-9 and requires no special winter care beyond a light mulch layer. In colder climates, the plant may die back to the ground but regrows vigorously in spring. Cut back dead foliage in early spring before new growth appears. This prevents disease and allows sunlight to reach the emerging shoots.
For container-grown Artemisia, move pots to a sheltered location before temperatures drop below 20°F. The plant's cold hardiness makes it ideal for perennial borders, but containers allow you to relocate it for maximum pest control effectiveness. You'll love how Artemisia becomes your garden's silent sentinel—no chemicals, just natural, fragrant protection.
Tips & tricks for perfect Artemisia vulgaris cultivation
These practical insights will help you maximize Artemisia's pest-repellent potential while avoiding common pitfalls.
Location Strategy: Artemisia thrives near pest hotspots—position plants within 3 feet of vegetable beds or entry points where insects congregate. The plant's scent works best when pests have direct contact with foliage. I've found that placing Artemisia near tomato plants creates a natural barrier that keeps aphids away without chemicals. The key is strategic placement rather than random scattering.
Soil Preparation Insight: The 6-inch soil amendment in Step 1 is non-negotiable for heavy clay soils. If you're working with clay, create those 12-inch ridges—this prevents waterlogging that can suffocate Artemisia's roots. I learned this the hard way after losing two plants to soggy soil. The ridges also create better air circulation around the base, which reduces fungal issues during humid seasons.
Pruning Technique: When pruning back one-third of leggy growth in early spring, focus on removing the oldest stems first. This encourages new growth from the base while maintaining the plant's dense structure. The scent intensifies after pruning because you're stimulating fresh leaf production where the essential oils are most concentrated. Time your pruning just as new shoots emerge—this is when Artemisia's pest-repellent compounds peak.
Harvesting Hack: For maximum pest control, harvest leaves in the morning after dew has dried. The oils are most potent at this time, and the leaves will be crisp rather than wilted. Bundle stems with rubber bands and hang upside down in a dark, well-ventilated area. Proper drying preserves the scent for months—dried Artemisia makes excellent sachets for closets and drawers to repel moths and silverfish.
Pro Tips for Artemisia Vulgaris Leaf
- These practical insights will help you maximize Artemisia's pest-repellent potential while avoiding common pitfalls.
- Location Strategy: Artemisia thrives near pest hotspots—position plants within 3 feet of vegetable beds or entry poin...
- Soil Preparation Insight: The 6-inch soil amendment in Step 1 is non-negotiable for heavy clay soils. If you're worki...
Frequently asked questions
How do I prepare mugwort leaves for pest control?
Fresh or dried Artemisia vulgaris leaves work best. Crumble them into pots, sprinkle around garden beds, or steep them in water (1 cup leaves per 2 cups water) for a spray. For stronger repellent power, let the leaves dry first—this concentrates their essential oils!
When is the best time to apply mugwort for pest prevention?
Apply mugwort leaves early in the season (spring) to deter pests before they become a problem. Reapply after heavy rain or every 4–6 weeks. For existing infestations, use it immediately—mugwort’s scent confuses pests like aphids and mosquitoes on contact!
Does mugwort repel all garden pests, or just specific ones?
Mugwort is most effective against soft-bodied pests like aphids, cabbage worms, and mosquitoes. It’s less reliable for hard-shelled bugs (e.g., beetles) or rodents. Pair it with other repellents like basil or marigolds for broader protection.
Can I use mugwort leaves indoors, or is it only for gardens?
Yes! Mugwort’s strong scent works indoors too. Place dried leaves in pots with houseplants or near windows to repel flying pests like fruit flies. Just avoid using it near pets—its compounds can be toxic if ingested.
What if mugwort doesn’t seem to be working?
Try these troubleshooting tips:
- Increase dosage: Use more leaves or a stronger infusion.
- Reapply frequently: Pests adapt—refresh every 2–3 weeks.
- Combine methods: Add neem oil or companion plants (e.g., lavender) for extra punch.
- Check placement: Ensure leaves are near pest hotspots, not buried too deep.
Wrapping up and next steps
Artemisia vulgaris leaf isn’t just a hardy garden plant—it’s a natural, chemical-free ally against pests like mosquitoes, aphids, and even deer! 🌿 Whether you’re using it as a companion plant, homemade spray, or mulch, its versatility makes it a must-have for eco-conscious gardeners.
The best part? You’re not just protecting your plants—you’re doing it safely and sustainably.
Ready to put this powerhouse to work? Start small—try a few pots of mugwort near your veggie patch or whip up a batch of repellent spray this weekend. Your garden (and your sanity) will thank you! 🌱✨