
Trees
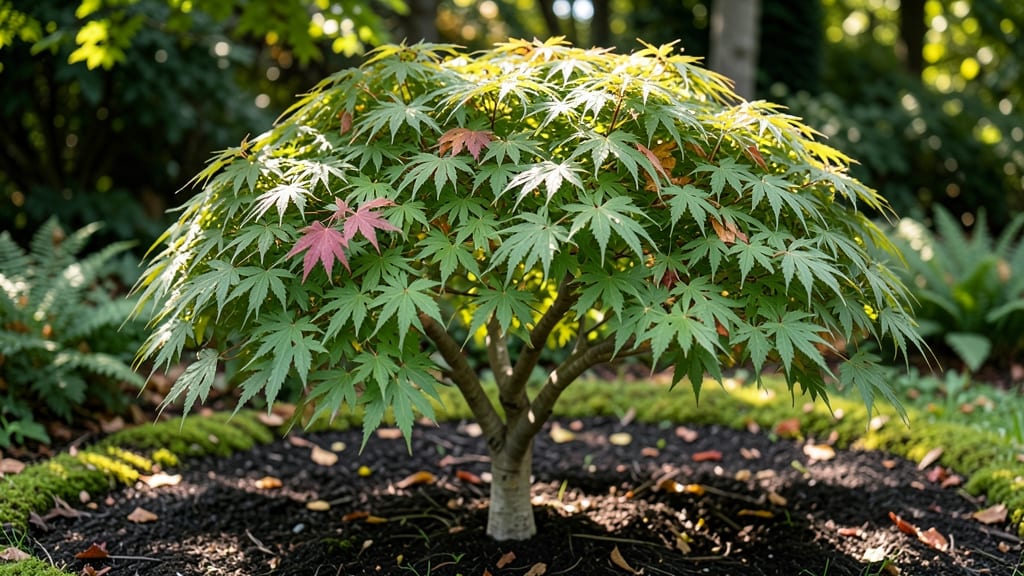
Growing a split leaf maple means adding year-round drama to your garden with almost no pruning work. 🌿 I've watched mine transform from delicate spring foliage to fiery autumn hues—and it's the easiest tree I've ever grown. The secret lies in its adaptability, not fussiness.
This tree thrives in partial shade, tolerates poor soil, and handles both wet and dry conditions better than most. You'll need space for its eventual 10-15 foot spread, but it grows slowly enough that you won't outpace it.
The real magic happens in winter when its skeletal branches create striking silhouettes against snow.
With proper placement, your split leaf maple will reward you with lush green leaves in summer, brilliant reds in fall, and graceful form year-round. The minimal pruning requirement means less work for you—and more time to enjoy its ever-changing beauty.
Perfect for small gardens, containers, or as a focal point in shaded areas. Here's how to get started with this low-maintenance stunner that outperforms most ornamental trees in every season.
📚 In This Guide
- What you need
- Instructions
- Tips and common mistakes
- Wrapping up and next steps
What you need
- ● Split leaf maple tree: A healthy nursery-grown sapling (3–5 gallons) or a mature tree (15+ gallons) for established drama. Pro tip: 🌡️ Opt for container-grown plants in early spring or fall for best root establishment!
- ● Well-draining soil: Mix 50% native soil with 30% compost and 20% perlite/pumice to prevent soggy roots. Split leaf maples hate wet feet!
- ● Mulch: 2–3 inches of organic mulch (cedar chips or pine bark) to retain moisture and regulate temperature.
- ● Slow-release fertilizer: 10-10-10 or a balanced tree-specific formula (apply in early spring).
- ● Gardening gloves (heavy-duty for root work).
- ● Shovel & spade: A round-point shovel for digging and a transplant spade for delicate root handling.
- ● Pruning shears: Bypass pruners (sharp, clean, and sterilized with rubbing alcohol).
- ● Watering can or hose with a gentle spray nozzle.
- ○ pH test kit (optional but helpful—ideal range: 5.0–6.5).
- ● Root stimulator: Mycorrhizal fungi or a seaweed-based solution to boost root growth.
- ● Tree stake & tie: Only needed for young saplings in windy areas (remove after 1 year!).
- ● Epsom salt: A magnesium boost (1 tbsp per gallon of water) if leaves show yellowing between veins.
- ● Frost cloth: For tender young trees in cold climates (Zone 5 and below).
Step-by-step instructions for planting and caring for split leaf maple
Here's how I get these stunning trees thriving with almost no fuss—just a little patience and the right timing.
🌱 Step 1: Choose the Perfect Planting Spot
Split leaf maples need full sun to partial shade—at least 4-6 hours of direct sunlight daily. I always pick a spot where they’ll get morning sun and afternoon shade, especially in hotter climates. The soil should drain well but retain moisture—these trees hate soggy roots.
Dig a hole twice as wide as the root ball but only as deep. This encourages roots to spread outward instead of settling too low. Loosen the edges of the hole with a shovel to prevent compacted soil from restricting growth. Here's the thing—if your soil is heavy clay, mix in some compost to improve drainage.
🪴 Step 2: Plant With Careful Root Handling
Remove the tree from its container and gently tease apart any circling roots—this prevents girdling as the tree matures. Place it in the hole so the top of the root ball sits 1-2 inches above ground level. Split leaf maples are forgiving, but planting too deep can cause rot.
Backfill with the native soil, tamping lightly every 2-3 inches to eliminate air pockets. Water deeply to settle everything, then add a 2-inch layer of mulch around the base, keeping it 3 inches away from the trunk. Too much mulch smothers the roots, and too little won’t protect them from temperature swings.
☀️ Step 3: Water Deeply and Establish a Routine
Water your split leaf maple once a week for the first month, then taper to every 2 weeks once established. You’ll know it’s time to water when the top 2 inches of soil feel dry. Overwatering is the biggest mistake—these trees are drought-tolerant once settled.
I like to water in the morning so the foliage dries by evening, reducing fungal risks. If your area gets heavy rain, check for standing water—split leaf maples despise wet feet. After the first year, they’ll need very little extra water unless you’re in an extreme drought.
✂️ Step 4: Prune Strategically for Shape and Health
Split leaf maples are low-maintenance, but I do one light pruning session in late winter or early spring before new growth starts. Remove any dead, diseased, or crossing branches first—these are the only cuts I make regularly. The goal is to maintain the tree’s natural shape without heavy-handed cuts.
If you want to encourage a bushier form, you can trim back some of the longer branches by one-third in early spring. Just avoid pruning in fall or winter—new growth then won’t harden off before cold snaps. Real talk: These trees handle neglect beautifully, so don’t stress over perfection.
🌿 Step 5: Protect and Enjoy Year-Round Interest
Split leaf maples deliver drama in every season—bright red foliage in fall, striking bark in winter, and lush green leaves in summer. To keep them looking their best, I add a 2-inch layer of mulch annually in early spring, and that’s it. No fertilizers needed unless your soil is truly poor.
Watch for spider mites in dry conditions—they love the fine foliage. A strong spray of water usually clears them up. Otherwise, these trees are tough as nails. With minimal effort, you’ll have a showstopper that turns heads all year long.
Tips & tricks for perfect split leaf maple planting
These small adjustments will help your split leaf maple grow into a stunning, low-maintenance centerpiece that thrives for decades.
Sunlight Strategy: That 4-6 hours of sunlight is non-negotiable, but here's the thing—morning sun and afternoon shade works best in hotter climates. If your yard only gets direct sun in the afternoon, position the tree where it gets those crucial morning rays first. I've seen split leaf maples struggle when planted in spots with only afternoon sun, even if they get the full 6 hours.
Root Ball Inspection: Before planting, give that root ball a thorough check for circling roots. I use my fingers to gently separate any roots growing in tight circles—they'll strangle the tree as it matures. This simple step in Step 2 prevents what could become a major problem down the road. Think of it as giving your tree a fresh start right from the beginning.
Mulch Mastery: That 2-inch layer of mulch around the base is your secret weapon for temperature control. I always keep it 3 inches away from the trunk to prevent rot. Pro tip: Refresh that mulch layer annually in early spring—it breaks down over time and loses its insulating power. Organic mulch like wood chips works best while also improving soil quality as it decomposes.
Watering Wisdom: The once-a-week watering for the first month might seem like a lot, but trust me on this—split leaf maples are surprisingly drought-tolerant once established. The key is getting them through that critical first month. I check soil moisture by sticking my finger 2 inches down—if it's dry, that's your watering cue. Overwatering is the silent killer of these trees, so always let the topsoil dry between waterings.
Pro Tips for Split Leaf Maple
- These small adjustments will help your split leaf maple grow into a stunning, low-maintenance centerpiece that thrive...
- Sunlight Strategy: That 4-6 hours of sunlight is non-negotiable, but here's the thing—morning sun and afternoon shade...
- Root Ball Inspection: Before planting, give that root ball a thorough check for circling roots. I use my fingers to g...
Frequently asked questions
Got questions about growing and maintaining your split-leaf maple?
You’re not alone! Here are some of the most common queries—plus straightforward answers to keep your tree thriving with ease.
How fast does a split-leaf maple grow, and how big will it get?
A split-leaf maple (Acer palmatum ‘Dissectum’) grows at a moderate pace—about 12–24 inches per year under ideal conditions. Mature trees typically reach 15–25 feet tall and wide, though dwarf varieties stay under 10 feet. Their slow-to-medium growth makes them perfect for containers or small gardens!
Can split-leaf maples survive winter, and do they need extra protection?
These hardy trees handle USDA Zones 5–8, but young or container-grown plants may need winter wraps or mulch in colder climates. Evergreen varieties (like ‘Bloodgood’) retain leaves year-round, while deciduous types drop foliage in fall. Pro tip: Avoid heavy snow buildup on branches—gently brush it off to prevent breakage!
Do split-leaf maples need frequent pruning, and when’s the best time?
One of their biggest perks? Minimal pruning! Trim dead or crossing branches in late winter or early spring (before buds swell) to encourage new growth. Avoid heavy cuts—these trees thrive on their natural, airy shape. Never prune in fall; it can stimulate late-season growth vulnerable to frost damage.
Are split-leaf maples deer-resistant, and how do I keep pests away?
While not fully deer-proof, their bitter leaves deter most browsers. For extra protection, use deer repellent sprays or physical barriers for young trees. As for pests, aphids and spider mites are occasional visitors—blast them off with water or treat with neem oil. Healthy soil = happy tree! Ensure well-draining, slightly acidic soil to boost natural resistance.
Can I grow a split-leaf maple in a container, and what’s the best pot size?
Dwarf varieties like ‘Little Palace’ or ‘Sango-kaku’ thrive in containers. Start with a 15–20 gallon pot (18–24” diameter) and upgrade as roots grow. Use fast-draining mix (60% potting soil, 30% perlite, 10% compost) and water when the top inch is dry. Move pots to partial shade in summer to prevent leaf scorch.
Why are my split-leaf maple leaves turning yellow or brown?
Yellowing leaves often signal overwatering or poor drainage—let the soil dry slightly between waterings. Brown edges? Low humidity or salt buildup (from tap water) could be the culprit. Check for fungal issues (like powdery mildew) if spots appear. Solution: Adjust watering, improve airflow, and fertilize lightly in spring with acid-loving plant food.
Wrapping up and next steps
The split leaf maple is a stunning, low-maintenance tree that brings year-round beauty to your landscape—whether through its vibrant foliage, striking bark, or graceful form. With the right care (like proper sunlight, well-draining soil, and minimal pruning), you’ll enjoy its drama with ease.
Ready to transform your outdoor space? Plant one today and watch it thrive!
Pro tip: Start small—whether in a container or garden bed—and let its natural elegance grow over time! 🌿✨