
How To
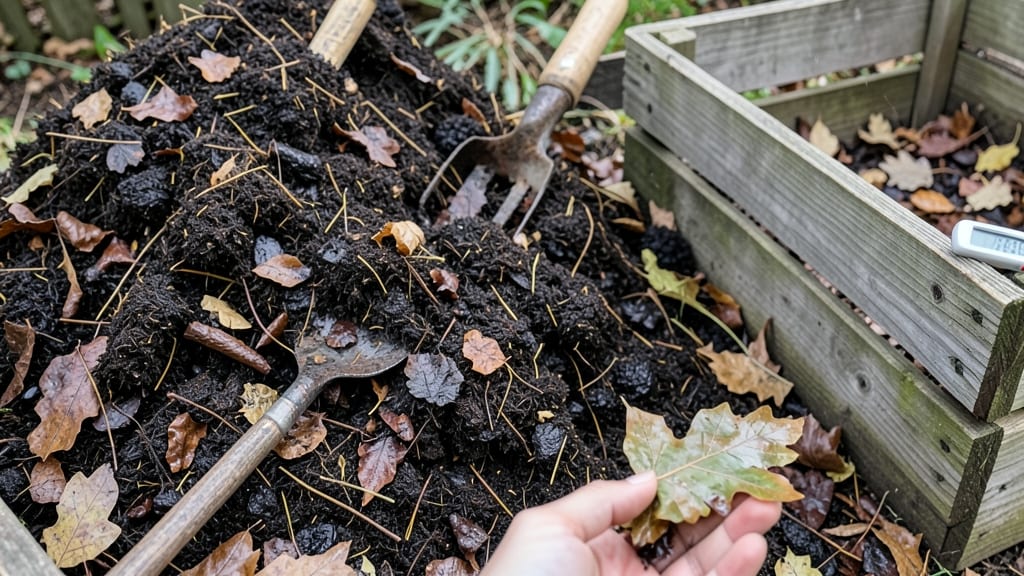
Making leaf mould transforms your fall cleanup into black gold for the garden. 🌿 Last autumn, I piled up leaves instead of bagging them—and by spring, I had fluffy, crumbly soil conditioner that outperform store-bought compost. The secret lies in patience, layers, and letting nature do the work.
You’ll need a 4×4-foot bin (or a corner of your yard), damp leaves, and a few sticks to aerate. Start with a 6-inch layer of coarse sticks at the bottom, then alternate 3-inch layers of leaves and soil—keep it slightly damp like a wrung-out sponge.
This mimics how forest floors naturally decompose.
In 6 months, you’ll have dark, earthy leaf mould that improves drainage, retains moisture, and feeds soil microbes. I use it to boost seedling mixes, top-dress perennials, and revive tired garden beds. The texture is lighter than compost but richer than peat moss.
Pro tip: Shred leaves first to speed up breakdown, and avoid oak leaves—they take twice as long. Once ready, mix it into soil at a 25% ratio for instant garden upgrades. No turning required, just wait and watch nature work its magic.
📚 In This Guide
- What you need
- Instructions
- Tips and common mistakes
- Wrapping up and next steps
What you need
- ● Fresh or dry leaves (preferably from deciduous trees like oak, maple, or beech): Minimum: 10–15 lbs (4.5–7 kg) for a small bin (1 ft³)
- ● Ideal: Shredded or torn (smaller pieces decompose faster)
- ● Water (for moisture balance): Enough to dampen leaves like a wrung-out sponge (not soggy!)
- ● Compost bin or container (with or without a lid): Options: Wooden box, wire mesh, or plastic bin (at least 18" deep)
- ● Ventilation holes: ¼"–½" diameter (if using a closed bin)
- ● Garden shears or shredder (to chop leaves into 1–2" pieces)
- ● Garden fork or pitchfork (for turning layers later)
- ● Twine or burlap (to secure loose leaves in windy areas)
- ○ Carbon-rich additives (optional but helpful): Straw, wood chips, or coffee grounds (1 part carbon per 20 parts leaves)
- ○ pH test kit (optional) (to check acidity—ideal range: 5.5–7.0)
Step-by-Step instructions for making leaf mould
Here's the foolproof method I've used for years—no fancy tools, just patience and layers.
🌿 Step 1: Collect and Prepare the Right Leaves
Gather dry, shredded leaves from trees like oak, maple, or beech—avoid diseased or chemically treated leaves. I like to run them over with my lawnmower first to speed up decomposition, but you can also tear them by hand. The smaller the pieces, the faster they break down. Spread them out on a tarp or clean ground to dry for 24 hours if they're damp—wet leaves create soggy, smelly piles.
Watch for yellowing or moldy spots—these signal rot or fungus. If you spot any, compost those leaves separately or discard them. The goal is a dry, crisp leaf base that will decompose evenly without attracting pests.
🪴 Step 2: Build the Compost Bin Layers
Choose a shaded spot with good drainage—sunlight speeds up drying, while shade keeps moisture balanced. Use a 3-foot-tall bin or wire mesh cage to contain the pile. Start with a 4-inch layer of coarse material like twigs or straw at the bottom for airflow, then alternate with 6-inch layers of shredded leaves and a sprinkle of garden soil or finished compost to introduce microbes.
Keep layers loose—don't pack them down. I like to fluff each layer with a garden fork to mimic a "lasagna" effect. This structure ensures air pockets for decomposition while preventing compaction. Aim for a 3-foot-tall pile total—bigger piles take longer to mature evenly.
💧 Step 3: Maintain Moisture and Turn Regularly
Check moisture weekly—your pile should feel like a wrung-out sponge. If it's dry, mist with water; if it's soggy, add more leaves. Overwatering creates anaerobic conditions that slow decomposition and produce foul odors. I use a hose with a gentle spray nozzle to avoid compacting the layers.
Turn the pile every 4-6 weeks using a pitchfork to mix fresh air into the center. You'll see the leaves darken and soften over time—this is your cue it's working. By 6 months, the material should resemble rich, crumbly soil. If it still looks like leaves, give it another month or two.
⏰ Step 4: Test for Readiness and Use
When the pile resembles dark, earthy humus with no recognizable leaf fragments, it's ready. Press a handful—if it holds shape but crumbles easily, it's perfect for garden beds. If it's still chunky, return it to the pile for another month. I always sift the finished leaf mould through a ¼-inch mesh screen to remove any remaining coarse bits before using.
This nutrient-rich amendment improves soil structure, retains moisture, and encourages beneficial microbial activity. Spread a 1-inch layer over garden beds in early spring or mix it into potting soil for container plants. The magic isn't just in the making—it's in how your plants thrive with it.
Tips & tricks for perfect leaf mould
Real talk: Leaf mould isn't just about tossing leaves in a pile—it's an art of balance and patience. Here's what nobody tells you about making the best leaf mould possible.
Leaf Selection is Everything: Oak and beech leaves break down beautifully, but avoid leaves from fruit trees—they can attract pests. I've learned the hard way that maple leaves work too, but only if they're completely dry. Wet leaves or those with yellowing edges will create a smelly, sluggish pile. The 24-hour drying time in Step 1 is non-negotiable—it prevents that dreaded anaerobic smell that turns your compost into a science experiment gone wrong.
The Layering Technique: Think of your compost pile like a lasagna—alternating layers create the perfect environment for decomposition. That 4-inch coarse layer at the bottom isn't just for looks; it's your aeration highway. I use twigs or straw because they create air pockets that microbes love. The key is keeping everything loose—don't pack it down like you're building a wall. When you fluff those 6-inch leaf layers with your garden fork, you're essentially creating a microbial city with skyscrapers of oxygen.
Moisture Management: The "wrung-out sponge" test in Step 3 is your golden rule. Too dry? Your microbes go dormant. Too wet? You're creating a swamp. I've ruined piles both ways—once with a soggy mess that smelled like a landfill, and another time with dusty leaves that just sat there. A gentle misting with a hose nozzle is perfect; you want to wake up those microbes, not drown them. And remember, turning every 4-6 weeks isn't just about mixing—it's about bringing fresh oxygen to the center where decomposition slows down.
Patience Pays Off: That 6-month timeline might seem long, but rushing it leads to half-baked results. I've seen people try to speed it up with heat or chemicals, and it always backfires. The magic happens when you let nature do its thing. By month 3, you'll start seeing darkening leaves—this is your first sign of success. The real test comes at 6 months when you press a handful and it crumbles like rich soil. If it's still chunky, give it another month. Trust me, the wait is worth it for that crumbly, nutrient-packed gold.
Pro Tips for Make Leaf Mould
- Real talk: Leaf mould isn't just about tossing leaves in a pile—it's an art of balance and patience. Here's what nobo...
- Leaf Selection is Everything: Oak and beech leaves break down beautifully, but avoid leaves from fruit trees—they can...
- The Layering Technique: Think of your compost pile like a lasagna—alternating layers create the perfect environment f...
Frequently asked questions
Got questions about making leaf mould? You’re not alone! Here are some of the most common queries—plus quick, practical answers to help you master the process like a pro.
How long does it really take to make leaf mould?
While leaf mould typically takes 6–18 months to fully decompose, you’ll see noticeable results in 3–6 months. Factors like moisture, temperature, and leaf type (e.g., oak vs. maple) can speed up or slow down the process. Patience is key—think of it as slow-cooked compost magic!
Do I need to water my leaf mould pile?
Yes! Leaf mould needs consistent moisture to break down—like a sponge, it should feel damp but not soggy. Water it lightly every 1–2 weeks (more in dry climates) and cover it with a tarp or burlap to retain humidity. Overwatering can lead to mold or anaerobic conditions, so balance is everything.
Can I use any leaves, or are some better than others?
Most leaves work, but avoid diseased or chemically treated leaves (like those from lawns sprayed with herbicides). Oak, beech, and maple leaves decompose well, while pine needles take longer. Shredding leaves speeds up the process by increasing surface area—like giving your pile a workout!
Will my leaf mould attract pests or rodents?
If managed properly, leaf mould is pest-resistant! To deter critters, avoid adding meat, dairy, or oily foods (stick to leaves, grass clippings, and carbon-rich materials). A well-aerated, tightly layered pile with a 1:1 carbon-to-nitrogen ratio minimizes odors and unwanted visitors. Think of it as a fortified compost fortress.
What can I do if my leaf mould smells bad?
A foul odor usually means your pile is too wet or compacted. Fix it by:
- Fluffing the pile to improve airflow (like giving it a gentle hug).
- Adding dry leaves, straw, or wood chips to balance moisture.
- Avoiding nitrogen-rich "greens" (like grass clippings) unless you’re adding extra browns.
Can I speed up the process?
To accelerate decomposition:
- Shred leaves finely (like confetti!).
- Add a handful of compost starter or finished leaf mould to kickstart microbes.
- Keep the pile in a warm, sunny spot (but not direct sunlight).
- Turn the pile every 1–2 months to aerate it.
What’s the best way to store finished leaf mould?
Once fully decomposed (soft, crumbly, and dark), store leaf mould in:
- A covered bin or tarp to protect it from rain.
- A shady, dry spot to prevent overheating.
Wrapping up and next steps
Making leaf mould is a rewarding way to turn garden waste into nutrient-rich soil—and you’ve got all the tools to succeed! 🌿 With patience and a few simple layers, you’ll unlock a natural fertilizer that’s perfect for plants, flowers, or even your lawn.
Whether you’re a beginner or a seasoned gardener, this process is easy, eco-friendly, and endlessly useful.
Ready to take the next step? Start small—try a single bin or section of your yard—and watch your leaf mould transform over time. Once you’ve mastered it, you can even share the know-how with fellow green thumbs! Happy composting! 🌱