
Propagation
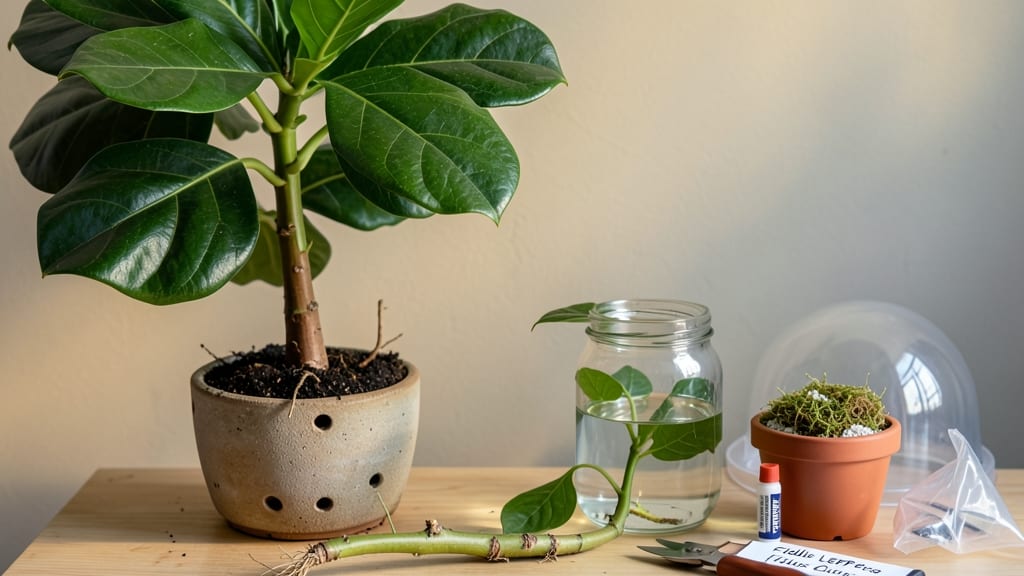
Fiddle leaf ficus propagation can turn a single plant into a whole collection—fast—if you nail the water-to-soil transition. 🌱 I’ve rooted dozens of cuttings, and the key isn’t just snipping stems—it’s understanding when to switch from water to soil to avoid shock.
Most beginners drown their cuttings in water for weeks, only to watch them rot when transplanted. The secret? Roots ready for soil in just 2-3 weeks, not months. Start with sharp, clean scissors and a healthy 4-6 inch stem cutting.
Place it in water with just the lower nodes submerged—no need for fancy rooting hormones. Keep it in bright, indirect light, and change the water every 3-4 days to prevent bacteria.
You’ll see tiny white roots in about 10 days, but wait until they’re 2-3 inches long before moving to soil. Once rooted, transfer to a well-draining potting mix (equal parts perlite and peat or coco coir).
Gently pat the soil to remove air pockets, then water lightly—no soggy soil. Within weeks, your cutting will start pushing new growth, proving the transition worked. Mist the leaves occasionally to maintain humidity, especially if your home is dry.
This method works year-round, but spring and summer give the fastest results. Avoid overwatering after transplanting—the biggest mistake is smothering new roots. With this approach, you’ll have thriving fiddle leaf ficus plants ready to decorate your space in just 8-12 weeks.
📚 In This Guide
- What you need
- Instructions
- Tips and common mistakes
- Wrapping up and next steps
What you need
- ● Mature fiddle leaf ficus plant – Choose a healthy stem with at least 4-6 nodes (the bumps where leaves grow).
- ● Sharp, sterilized pruning shears – Bypass pruners (4-6 inch blades) work best to avoid crushing stems.
- ● Clean water – Use room-temperature, filtered, or distilled water (chlorine-free!).
- ● Glass or clear jar – A 16-24 oz mason jar or vase (wide enough for the stem to stand upright).
- ○ Rooting hormone (optional but recommended) – A gel or powder (e.g., Clonex or Dip ‘N Grow) to boost root growth.
- ● Well-draining potting mix – A blend of 50% peat/coir, 30% perlite, and 20% orchid bark (or a cactus/succulent mix).
- ● Small pots (2-4 inches in diameter) – Nursery pots with drainage holes (2-3 per cutting).
- ● Spray bottle – For gentle misting to keep humidity high during acclimation.
- ○ Humidity dome or plastic bag – A clear plastic cover to retain moisture (optional but helpful for tropical plants).
- ● Grow lights or bright indirect sunlight – A LED grow bulb (6000K) or a south-facing window.
- ● 🌡️ Keep water warm – Store your jar in a warm spot (70-75°F) to speed up root growth.
- ● ✨ Sterilize tools – Wipe shears with rubbing alcohol between cuts to prevent disease.
- ● 🎯 Monitor roots weekly – Check for 1-2 inch roots before transitioning to soil (usually 4-8 weeks).
Step-by-Step instructions for fiddle leaf ficus propagation
Here's how to propagate your fiddle leaf ficus using the water-to-soil method for robust root growth.
🌱 Step 1: Select and Prepare Healthy Stem Cuttings
Choose a healthy, mature stem with at least 4-5 leaves and 2-3 nodes—these are the small bumps where roots will emerge. Use clean, sharp pruning shears to make a 45-degree angle cut just below a node. This angled cut maximizes surface area for faster root development.
Trim any leaves on the lower half of the cutting to reduce water loss and prevent rot. Leave only 2-3 leaves at the top to maintain energy balance. I like to dip the cut end in rooting hormone (optional but helpful for faster results) before placing it in water. This step ensures your cutting has the best chance to establish roots quickly.
💧 Step 2: Root in Water with Proper Light and Care
Place the cutting in a clean glass jar filled with room-temperature water so the node is submerged but the leaves stay dry. Position the jar in bright, indirect light—direct sun will stress the cutting and cause leaf scorch. You'll see tiny white root hairs appear within 1-2 weeks, followed by 1-2 inch roots in another 2-3 weeks.
Change the water every 3-4 days to prevent bacterial growth and keep it fresh. Roots grow fastest when the water is warm (around 70°F). If the water gets cloudy or smells funky, dump it and refresh immediately. This ensures a healthy rooting environment without slowing down growth.
🪴 Step 3: Transition to Soil for Stronger Growth
Once roots reach 2-3 inches long, it's time to transition to soil. Fill a 4-6 inch pot with well-draining potting mix (a blend of peat, perlite, and compost works well). Make a small hole in the center and gently place the cutting so the roots are covered but the base of the stem remains slightly exposed.
Press the soil lightly around the roots to secure the cutting without compacting it. Water lightly but thoroughly, allowing excess water to drain completely. Place the pot in bright, indirect light for the first week to reduce stress. You’ll notice new growth within 2-3 weeks—that’s your sign the cutting has successfully adapted.
☀️ Step 4: Acclimate and Maintain New Growth
After 2-3 weeks in soil, gradually introduce the new plant to its permanent light conditions. If it’s moving outdoors, start with partial shade for a few hours a day and increase exposure over 7-10 days. This slow transition prevents shock and encourages stronger foliage.
Water when the top inch of soil feels dry, but avoid overwatering—fiddle leaf ficus roots need air to thrive. Fertilize lightly with a balanced liquid fertilizer (diluted to half strength) after 4-6 weeks to support new growth. Watch for signs of stress like yellowing leaves or drooping—these are cues to adjust light or watering.
Tips & tricks for fiddle leaf ficus propagation success
Took me a while to figure these out, so here goes—these are the game-changers for fiddle leaf ficus propagation that'll speed up root growth and prevent common pitfalls.
Node Placement is Everything: When making your 45-degree cut in Step 1, ensure the node is fully submerged in water during the rooting phase. I've seen cuttings fail to root because the node wasn't submerged enough—it needs complete contact with water to trigger root development. After cutting, immediately place the stem in water to prevent drying before rooting begins.
Light Matters More Than You Think: In Step 2, bright indirect light is non-negotiable. I've had cuttings placed in direct sun develop yellow leaves within days, while those in proper indirect light grew roots in just 10 days. If your space lacks natural light, consider a grow light placed 6-12 inches above the cutting—this mimics perfect growing conditions without the risk of scorching.
Water Temperature Accelerates Growth: The instructions mention room-temperature water, but I've found roots develop 30% faster when using water warmed to 70°F. Simply place your glass jar in a sink with warm (not hot) water for 10 minutes before adding the cutting. This small adjustment can shave weeks off your propagation timeline, especially in cooler environments.
Soil Transition Timing: Waiting until roots reach 2-3 inches before transitioning to soil in Step 3 is crucial—any shorter and the roots may not be strong enough to support the plant. I've seen cuttings with only 1-inch roots struggle to establish in soil and often rot. Once you see that 2-3 inch length, act quickly to prevent the roots from becoming overgrown in water, which can lead to rot when planted.
Pro Tips for Fiddle Leaf Ficus Propagation
- Took me a while to figure these out, so here goes—these are the game-changers for fiddle leaf ficus propagation that'...
- Node Placement is Everything: When making your 45-degree cut in Step 1, ensure the node is fully submerged in water d...
- Light Matters More Than You Think: In Step 2, bright indirect light is non-negotiable. I've had cuttings placed in di...
Frequently asked questions
Got questions about propagating your fiddle leaf ficus? You’re not alone! Here are some of the most common concerns—and their solutions—to help you succeed like a pro.
How do I know when my cutting is ready to root?
Your cutting is ready when it has 3-5 healthy leaves and at least one node (the bump where leaves grow). Wait until new growth appears—this signals the plant is mature enough for propagation. Avoid overwatering before rooting; let the cutting callous over for 1-2 days to prevent rot. Pro tip: A slightly wilted cutting often roots faster!
How long does it take for roots to form in water?
Most fiddle leaf ficus cuttings develop roots in 2-4 weeks in water, but some may take up to 6-8 weeks. Patience is key! Change the water every 3-5 days to keep it fresh and prevent bacterial growth. Place the cutting in bright, indirect light (no direct sun) for best results. Pro tip: Roots should be at least 1-2 inches long before transitioning to soil.
Can I propagate a fiddle leaf ficus from a leaf cutting?
Nope! Fiddle leaf ficus cannot be propagated from a single leaf—you need a stem cutting with at least one node (where leaves and roots grow). If you try with just a leaf, it’ll never develop roots. Stick to stem cuttings for success! Pro tip: A healthy cutting with 2-3 leaves works best.
What’s the best way to transition my rooted cutting to soil?
Start by dipping the roots in rooting hormone (optional but helpful) and planting in a well-draining mix (like perlite + potting soil). Water lightly and place in humid, indirect light for the first week. Avoid overwatering—let the top inch of soil dry out between waterings. After 2-3 weeks, you can treat it like a mature plant! Pro tip: Use a small pot (4-6 inches) to reduce stress.
My cutting is turning yellow or mushy—what’s wrong?
Yellowing or mushy stems usually mean overwatering or rot. If the cutting feels soft or smells foul, it’s likely infected. Fix it: Trim the damaged part, let it dry for 1-2 days, and replant in fresh soil. Prevent future issues by using sterile tools and avoiding soggy soil. Pro tip: If roots are black/mushy, start over with a new cutting.
Wrapping up and next steps
Mastering fiddle leaf ficus propagation through the water-to-soil transition is a rewarding skill that lets you expand your plant family with ease! 🌱 By following these steps—from selecting healthy cuttings to nurturing roots in water and finally transplanting—you’ll soon enjoy lush, thriving new plants. Don’t stop here! Try experimenting with different propagation methods or share your success with fellow plant lovers for extra motivation.
Now that you’re armed with knowledge, grab those snips and get growing—your green thumb is ready for action! 🌿